
A small update
66. May 2014 by Peter
Hi guys.
I got an email last week from a guy in Finland who asked me if I had given up on my project… Well, not at all!!!
But the last month(s) have just been a lot of small steps and fixing errors. So let me just keep you up-to-date with what I have been doing:
The new computers caused a lot of problems.
After I got three new computers in my shed all sorts of trouble started.
First of all I moved all computers to the aft of the cockpit. Bad move! My OpenCockpits MCP (AutoPliot) did not like an extender cable. No matter what I tried the MCP kinda timed-out every minute. I think I tried all tricks in the book: Powered USB-hubs, 5v direct supply, powered USB-hub of a good quality. But nothing worked! It still went dead after a minute or so, but could be woken using the “Light test” switch. So after a few weeks of frustration I gave up and moved one computer up front next to the F/O seat. Touché.
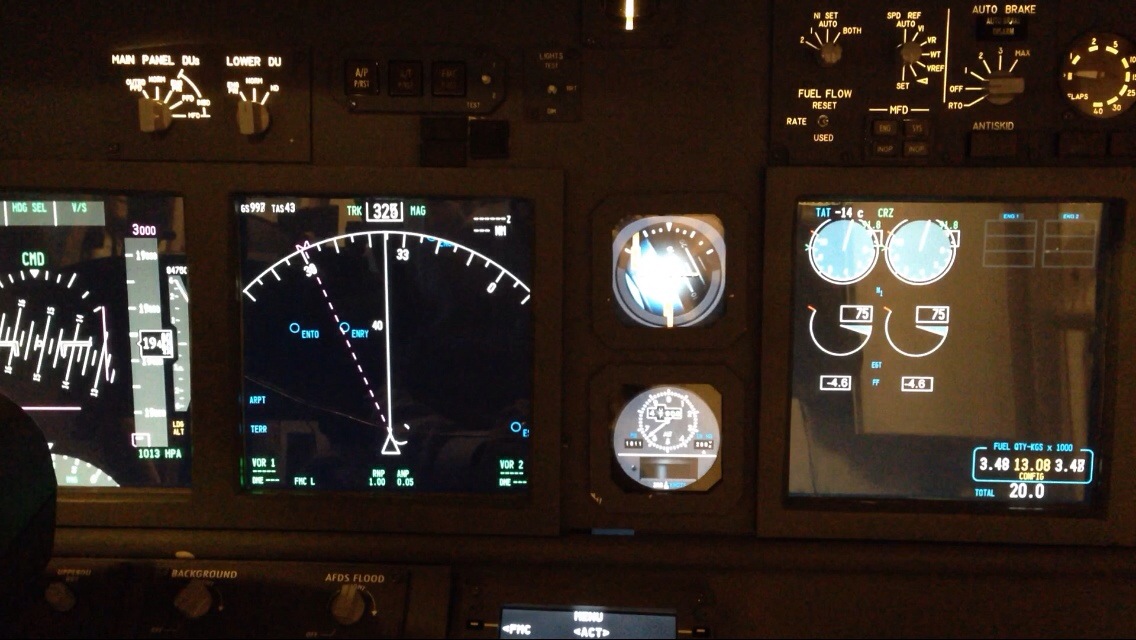
A not all that stable flight
But I still had some strange issues. Like the computers not were able to connect to the network. This resulted in some strange readouts on the displays when the connection was lost; like to he right, where the flight actually is stable at FL120.
After yet another few weeks of frustration I excluded many different things and narrowed it down to the ethernet switch in the cockpit. Now a few things started working. But not all. So I ended up changing – not one, but – two faulty ethernet switches.
However the new computer set-up still causes a few problems. Every now and then (mostly on approaches) the value in the autopilot resets so the ILS heading all of a sudden is “000”. Have not had time to investigate this any further than it happens when the flaps position is called out in Prosim737.
Annunciators
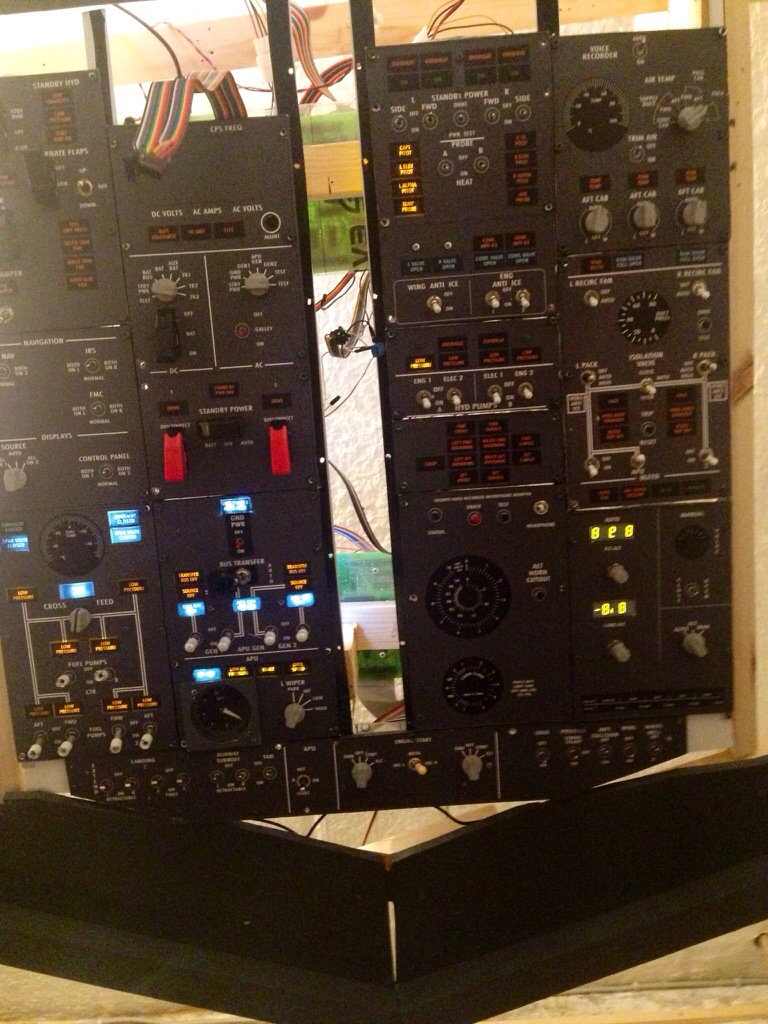
Still work-in-progress. Now doing the middle section.
After waiting a month or so I finally got around ordering new LEDs from Tayda Electronic for the overhead. So right now I an adding annunciators to all panels on the overhead. You can see that some of the panels work. I am removing each panel again and giving them a work over on the backside so all switches are connected and all annunciators are fitted with LEDs. Hopefully I will achieve a nice layout on the backside.
However pretty fast I ran out of dupont wires so now I have to wait two weeks again before they arrive from China.
Extra Mastercard
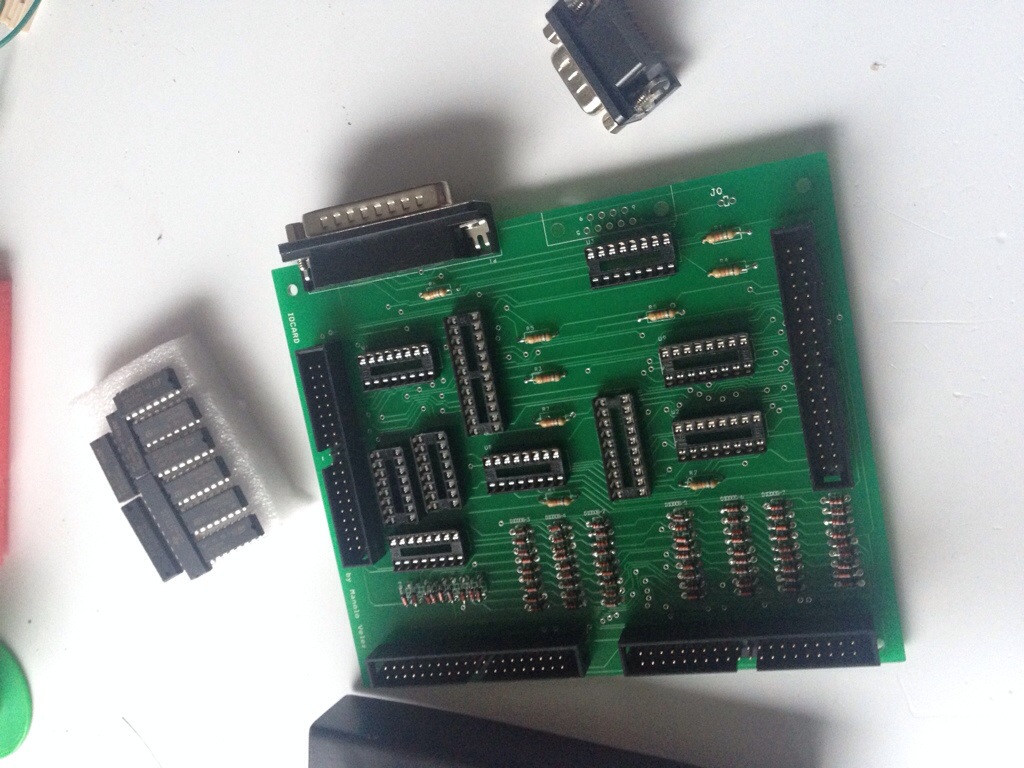
DIY OpenCockpits mastercard.
At this point I have two master cards installed behind the overhead. But for most annunciators to work I need a third one. I had a DIY-kit from OpenCockpits laying around. So I have been soldering that the last couple of days.
This is my second DIY MasterCard, but I have also made 2 DIY display cards. They work flawless. Note I use DIP-sockets for all IC-units so they not are damaged from the head when soldering.
I have also 2 extra display cards laying around waiting for some 7-segment units to arrive so I can make the IRS-display and the electrical display, and an extra servo card for the overhead gauges.
So at this point the cockpit runs on OpenCockpits alone: 2 USB-expansion cards, 6 master cards, 6 display cards, 1 servo card, 1 USB-keys card and a plug’n’play MCP.
Leather top
The glare shield (Or what ever that part between the autopilot and window frame is called) has been overhauled and each of the three parts wrapped on fake leather. It gives a really nice feel with some material other than MDF.
No pictures at this point as you not are able to see anything else than a black surface.
Roof structure
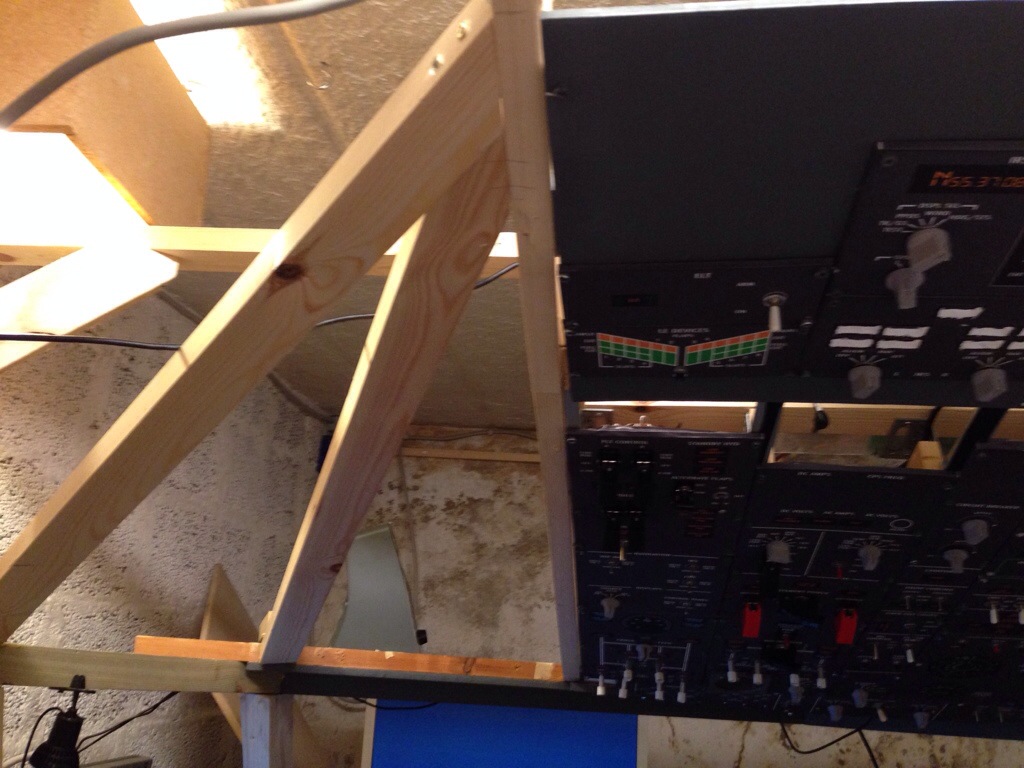
Roof structure slowly on its way.
Finally I have been spending many hours making something as simple as a structure for the ceiling. Sounds simple; but there are no drawings available. So I kind of had to look at different pictures and make my own.
It was at this point that I realized that no cockpit is alike. We all end up with different angles on various things. So you can’t take the measurements from another builder and transfer them directly to your own cockpit.
At this point I am working a lot on the overhead so I need to be able to access the backside of the overhead. But later I will cover the structure. I saw a brilliant idea from a Belgian builder that I will share with you later on. Just need to try it first.
What holds the near future
- I need to finish the overhead. I have ordered some 7-segment displays for the different displays in the overhead. 3 master cards should do the trick.
- Interface the whole thing…
- Gauges on the overhead will come along the way. I also heard about problems using a second OC servo card.
- More work on the sidewalls.
- Need to clear up. The basement is one big mess!
- Install and test new VATSIM pilot-client.
- Paint the walls in the room white.
- Perhaps even go flying at some point.

Yaay it’s good to have news from you 😀
I cannot stop admiring your work especially the over head
how did you do the annunciators? it look awesome
Hi Yakov.
It is simply a hole in the plate behind and then high intensity LEDs that shines through the foil.
If you look closely you will see that the finish not is that good.
I am wiring the last parts. Hopefully I will be done next week. Then I’ll post more details on the overhead.
Cheers Peter
Project is moving little by little 🙂 Your overhead has got some soul with those lights ! Check this picture for shell http://s8.postimg.org/lmxyiui6d/support_OVH.jpg in picture starting from left are : overhead structure , middle : overhead structure angles and right there is shell itself.
Im not sure does this help but made decision to upload afterall..
Jensen is good router builder. You told that long cable between MCP and PC was acting weird, try other cable. Cable lenght should not affect if its not taller than 15 meters.
Keep up good work !
Hi Roope.
Thanks. And thanks for forcing me to make the update. 🙂 It was long overdue!
Regarding the Autopilot I could only get it to work if I connected it directly in to the computer. So that is how it is I guess.
Regarding the structure I’ll also do a posting on that later on.
Best regards Peter
You used something like this ? http://goo.gl/bnPXaT there is only two issue which could lead problem on signal transfer between pc and device. When we talk about electrical phenomenom , and im now talking of resistance – we can notice that long cords drops voltage and usb powered units could act weird. But you mentioned that you used powered usb hubs , still if cord is too long , you got drop. There is some highspeed usb cabels available on internet , i would try these 🙂
Then secondly, your cable is broken, and second cable which you tried after that 😀
But you fixed whole case by moving pc on FO side, maybe thats easiest ( most efficient way currently ) to solve that problem..