
Lessons learned from the pedestal
14. April 2013 by Peter
I had a small talk the other day with a fellow builder about the headache building a pedestal gives you.
Even though building a pedestal has caused me a some challenges it has also given me many valuable lessons that I would like to pass on.
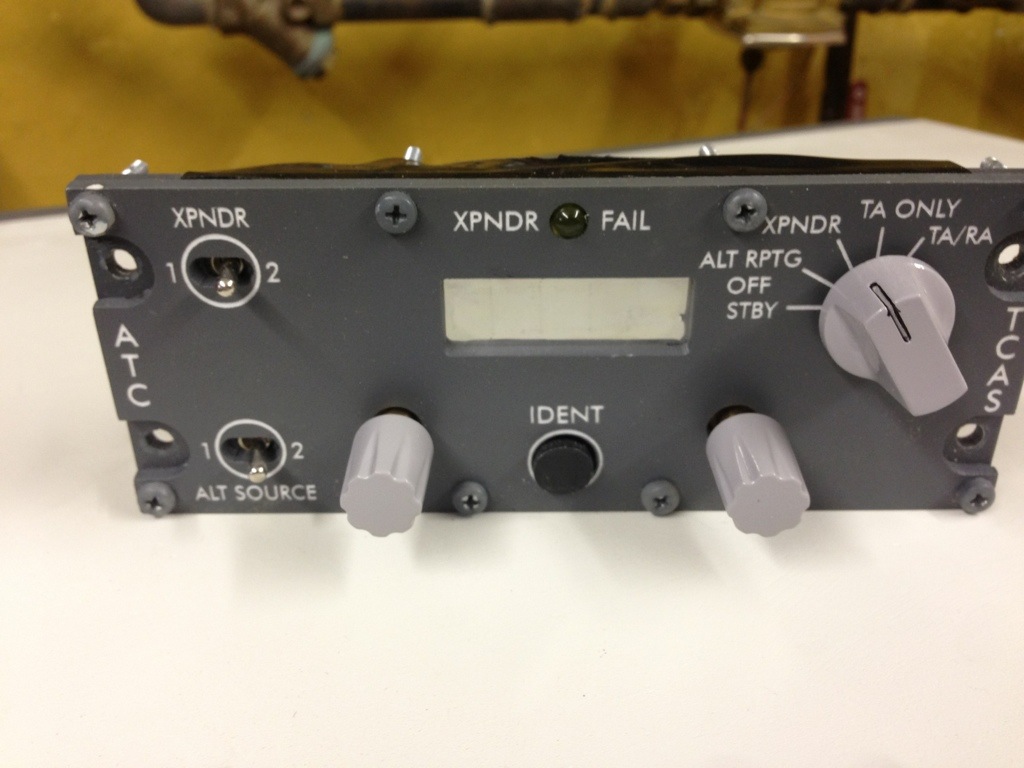
Transponder
I bought the pedestal from ProSimParts and is very-very happy with it. Quality is about the same as OpenCockpits.
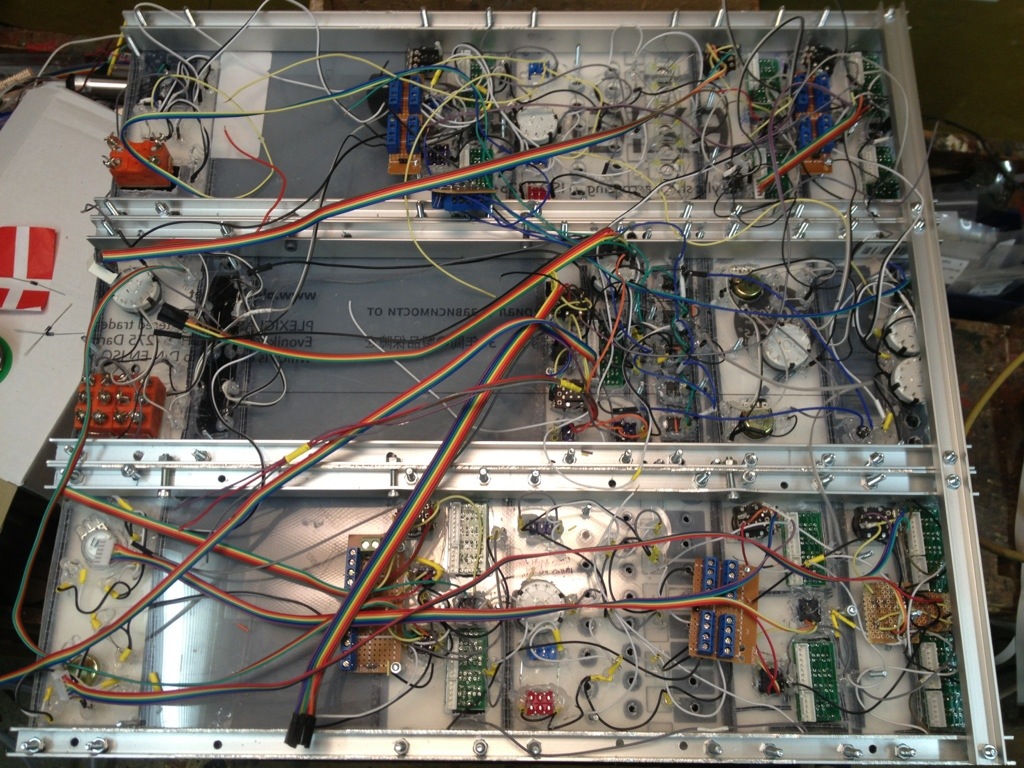
One big mess in wires. Mostly for the backlighting.
To begin with I mounted all electronics in a single plexiglass-plate (aprox 45×45 cm). All switches, LEDs, encoders etc was mounted directly onto the plate with 30-40 cm of wires mounted on to each panel. As seen on the picture on the right.
This however didn’t work very well. Some wires came loose when working on different parts of the plate. And I had to take out the whole thing if I wanted to modify or add anything.
I have changed method lately. From now on every panel is made as a single unit!
There was many switches and displays that didn’t work properly when I had assembled everything on the the single plate. When ever I need to work on / modify a panel I actually cut a hole in the plexiglass-plate and produce the panel as a separate unit.
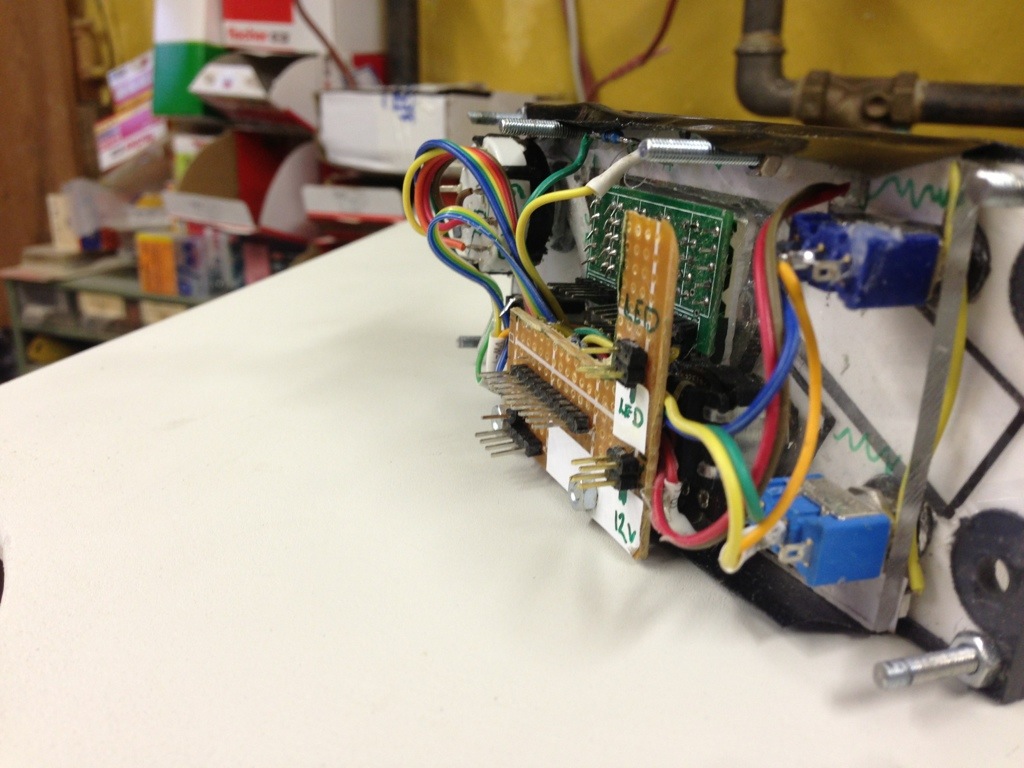 Here is an example from the transponder. The picture is the back side of the transponder. It has 3 layers on the backside:
- A plate of plexiglass, spaced 5 mm behind the panel with a nut. All switches are mounted on to this plate. Also LED strips (used for backlight) is glued on this plate.
- All 7-segment-displays are mounted on a PCB (Printed circut board). That is the green board. A small guide to 7-segment the-easy-way in next posting.
- All connections (except the 7-segments) are collected on a prototyping-board with pins (The back-plate).
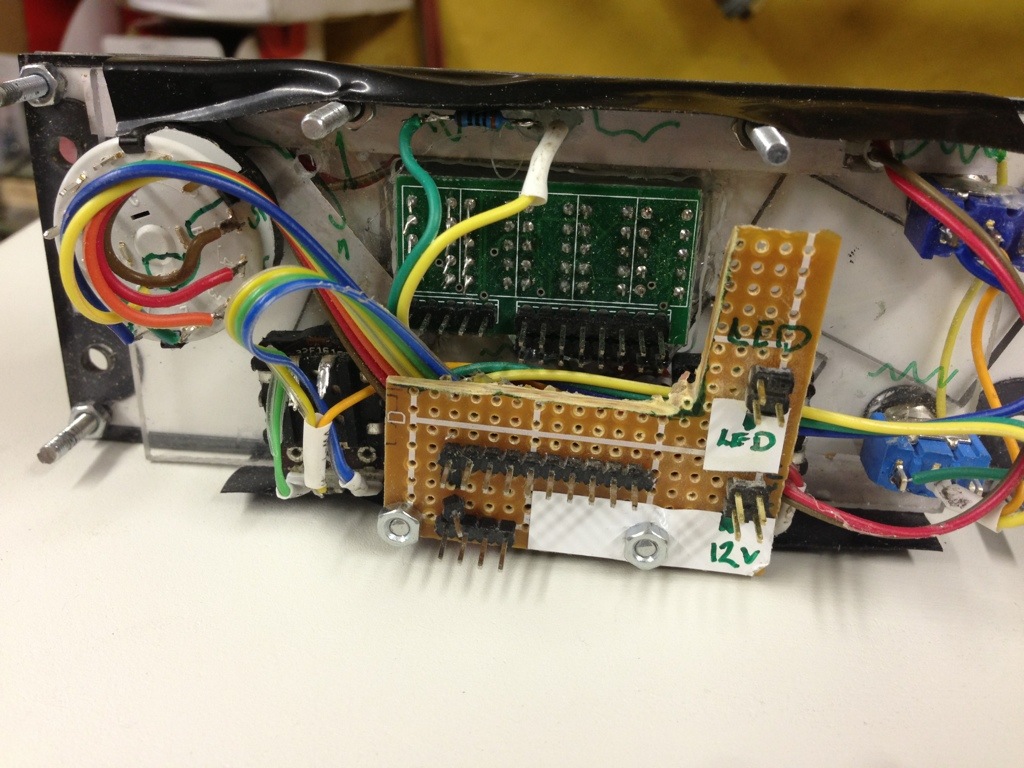
Backside of transponder
This solution works very well!
If I need to add/modify a panel I can take it out of the rack, do the work and place it back in afterwards.
But also I would recommend everyone to add connection-pins on the back that can be wired up easily with dupont-wires.
There is a pin for all necessary connections on my back. For those things that share the GND with other panels (like LEDs) there are 2 (or more) GND pins so that the GND can be transfered easily to another panel with out soldering two wires together.

Dupont-wire with a 5-pin head
One thing I also have learned is that home made wires/connections are more likely to fail than pre-made wires. I had to redo my wiring for the 7-segment displays two times before I discarded the darn thing and bought some pre-made of eBay. Especially if you need to share a wire (have two wires in one connection) things tended to go wrong for me.
My solution is to use double-row pins and pre-made dupont-wires with the matching size head. This minimizes the risk of error. It might be a bit more expensive than making them you self. But it saves a lot of work and makes it easier to work with. For the pedestal I use both 1pin-houses, 5-pin, 6-pin, 8-pin housings and 2×5-pin housing for connecting to the mastercard.
On the back of the transponder you find:
- 1 pin for the LED (XPNDR Fail), with 2 GND pins. All LEDs on the pedestal shares the same GND so better pass the GND-connection on easily.
- 2×2 pins for 12v backlightning. Again the power must be transfered on to other panels hence at least 2 sets of pins. Or add 3-4-5 sets now you are at it, they might some in handy.
- 2 rows of inputs/switches. First row is 1 GND and 9 inputs. The one below is 1 shared GND and 3 inputs.
The top row does not share GND as the OpenCockpits card only allows 9 inputs per group/GND. But the 3 inputs below needs to share this GND with other panels and therefore has a shared GND.
So far the pedestal has taken almost half a year – but I have also made a MIP in the meantime. Only 5 panels are working – the rest is dummies at this point. But using the “single rack” method creating new panels is just a matter of cutting a hold in the old plexiglas-plate, make the new panel as a separate unit and then slide it back in. It takes about 1-2 evenings to make a panel, so that is quite fast done.
So as I explore the posibilities in ProSim I will expand the pedestal.

Great Tips!