
Overhead – Update + video
210. September 2013 by Peter
Overhead in the making
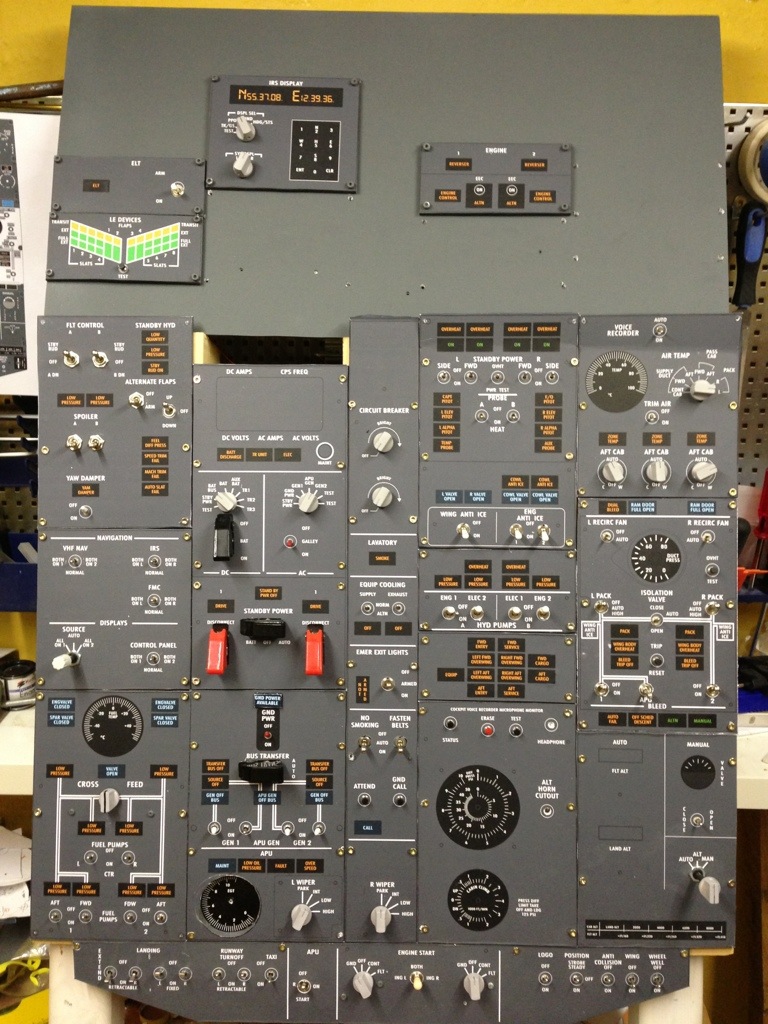
The overhead is getting along just fine.
Most switches are installed on the lower overhead and I have started mounting the upper overhead.
My annunciators did not turn out as well as I hoped it would. As you might remember my panels are made from a print on white sticker. The intensity of the LEDs is only able to make the annunciators to look dimmed when lit. So I might end up buying OpenCockpits €120 annunciator-kit for the FWD overhead.
You might be able to see that the APU gauge seems a bit deeper. I have removed the gauge from the print/sticker and made a hold. Then a second layer shows the gauge. This enables be to make working gauges.
You can download the Illustrator-file via the link in this posting.
This video shows explains the overhead.

Hi,
My name is Ermias and I am ProSim user. I saw your post about overhead DIY panel and followed the link to your website. It is great and innovative. I too like to do things by hand and I love creating first before I give up and buy the panels.
I also have built my simulator in my basement and we both used similar approach to build the overhead. I got a copy of OH 1:1 ratio from Juan Cordon’s website: http://users.skynet.be/jcordon/cockpit/plans.htm
and printed the whole panel and sandwiched it between plexi glasses after cutting the annunciation panel legends to replace them with open cockpit legends and holding boxes.
I am still working on my panel, but as yours I too have two children and teach at UPenn so time is tight.
So I really like to see your work in progress and may be we can share ides too. If you have time visit my website; I am also thinking to update it to reflect my recent changes.
Thanks a bunch,
EZ
Hi Peter
I must say that is a big project I’m interested and I will build it
I would like help on how to connect the switches to the LEDs, is there a pattern?
and then you can tell me how many shots are rotary switches and the value in ohms of the knobs? otherwise the risk of using incorrect values.
One last thing about it I saw that some of the switches are switches with 6-pin you can give me the number of detailed components.
I look forward to hearing from you if you want you can send your reply to my mail
Thanks greetings.