Comparison of OpenCockpits and CP Flight
Leave a comment11. December 2022 by Peter
It is about 9 years since I made my pedestal. Since then I have made a rebuild and I have added a few OEM panels. The Pedestal has been based on the OpenCockpits MasterCards and DisplayCards. Over the last year I have been switching the radio units from my home build to plug’n’play units. I am going down two paths: OpenCockpits and CP-Flight.

Connections
Your DIY panels has a great variety of options. I have used the OpenCockpits MasterCard and DisplayCards up until now. When I began building Arduino wasn’t an option. Later came MobiFlight and today I think I would build each panel on a Arduino Nano reducing the number of wires drastic. Before I started switching to Plug’n’play there were close to 200 wires in my pedestal.
OpenCockpits are USB-based. So you can connect them directly to your computer and via SIOC make them work as a standalone unit. Now SIOC is no picnic. But when using Prosim you can use SIOC direct and then it is almost plug’n’play.
CP Flight is not a stand alone unit. It requires that you also have a CP Flight Autopilot unit. The CP flight eco-system is based on a daisy chain from the autopilot unit using a 5-pole DIN-cable. The connection the the computer happens via USB/Ethernet from the autopilot unit. But once you own the CP Flight autopilot unit you can expand using CP Flight.
Installing the CP Flight module was pretty strait forward. After connecting the module I had to restart my computer. Then it was recognised by Prosim and working “out of the box”.
The OpenCockpits module costs €180 (incl VAT) in the EU where as the CP Flight radio costs €240 (inside EU). Both a hefty price tag. But you might be able to pick up both units used for around €100. A much more reasonable price.
Quality
DIY – ProSimParts
My old DIY panels are for ProSimParts in Belgium. I payed something like €230 those 9 years ago. They have done their job good and they have been heavily used and by now the panels does have a lot of tear and wear. The DIY versions can be made in many different ways. And a lot has happened the last 9 years. Today a small Arduino Nano will get rid of a lot of cables.
Opencockpits
The OpenCockpits Plug’n’play modules has a very nice feeling to them. The surface has a very nice paint job. You can almost feel the powder in the powder coating. The panel is made from a sandwich of 3 layers of acrylic. One 3 mm, a thinner middle piece and a 3mm front plate. One thing though the surface seems like it will scratch easy. I know the panel is just sitting there is the pedestal. But it is also your throw away place for things like charts, pencils and all other kinds of stuff. So at some point it might get a bit of tear and wear.
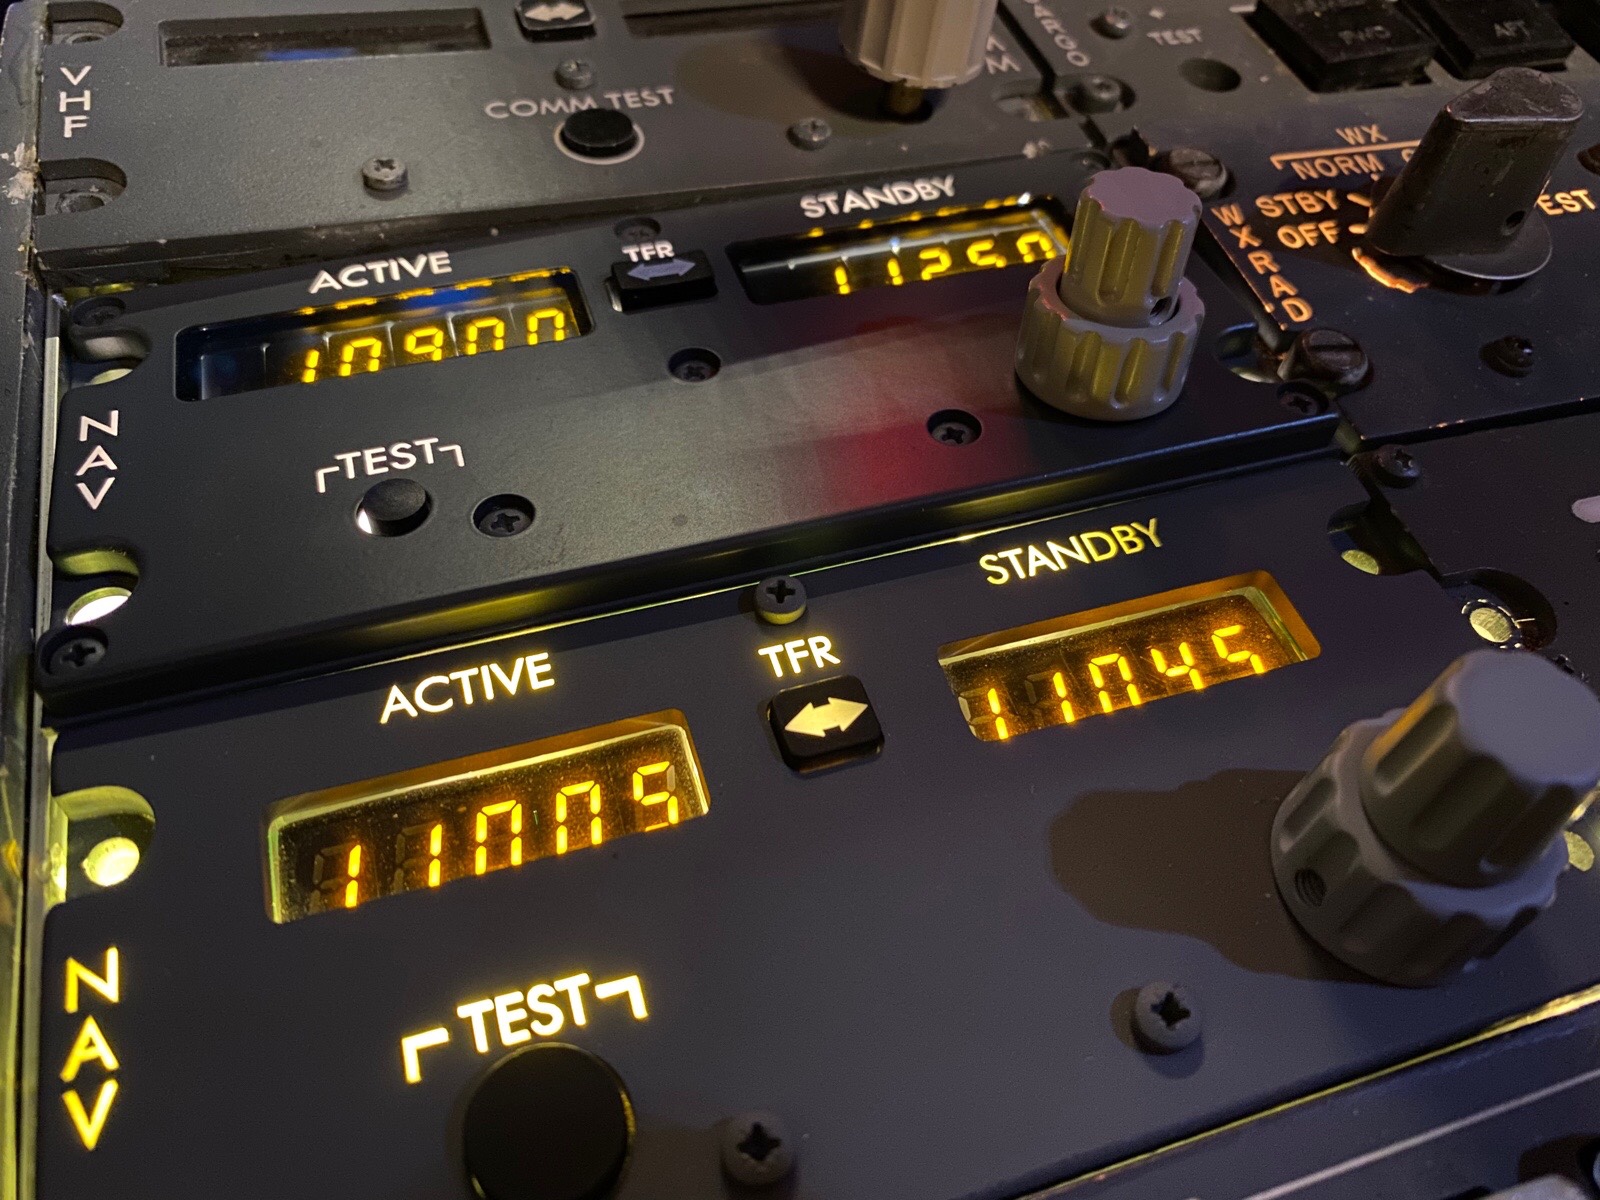
Overall a nice looking panel. The numbers/digits are crisp and sharp. The engraving is well done and the backlightning is bright. There is a bit of an unevenness to the backlightning. But nothing that would made me consider not using OpenCockpits.
On the backside of OpenCockpits there is no enclosure. There is a backplate but the sides and printed circuit boards are exposed. This might not be that big of an issue. The backlightning is done by LEDs and because it not is enclosed the backlight not only lights up the panel but also shines it light to the surroundings.
I do have an issue with OpenCockpits Plug’n’Play units. In my setup they are a big laggy. There is a lag from when you turn the knob to when the digits in the display changes. The cause might be in my setup. But according to Prosim there is no delay in the communication with SIOC. Perhaps it has to do with my set. If you experience the same or something else please let the other ones know in the comments.
CP Flight
The single CP-flight module costs as much as an entire set of pedestal panels (excluding electronics, I know). So it better be a good quality. Well it is!
Compared to the OpenCockpits it is better is all aspects. It has an aluminium backplate and 5mm frontplate. The acrylic seems more sturdy and less prone to scratches. The acrylic frontplate is just half a millimeter smaller than the aluminum backplate so all scratches will be on the backplate rather than the frontplate. The displays are bigger than on the OpenCockpits and they are flush with the frontplate. It just looks fantastic.
The Cp-Flight modules are enclosed in a metal box. So no electronics are exposed and it is only a few centimeters deep. The enclosure not only protects the unit. It also prevents the backlightning to shine out on to other modules.
The displays reacts right away when you turn the knobs. There is not delay what so ever.
Conclusion
Price equals quality.
I guess it can be said as easy as that.
However sometimes you can be lucky and find both OpenCockpits radios and CP Flight radios as used unit on various marketplaces at around half the price. That makes the plug’n’play path much more interesting.
The radios are key elements of the sim. That is the reason I am switching to Plug’n’play. My experience with DIY panels so far has been that sometimes they fail. Not being able to tune the right frequency can be quite frustrating. Other parts of the pedestal are secondary and not so important to have as something that just always work.
The CP Flight modules require a CP Flight Autopilot unit before you can use the CP Flight ecosystem. Once bought the CP Flight modules are in a league better than OpenCockpits. The feel. The looks. The build quality. Everything is just that bit better. And as long as I am able to find CP Flight modules at reasonable prices I would definitely go with CP Flight.