
FMC part 8 – Now working!
620. March 2014 by Peter
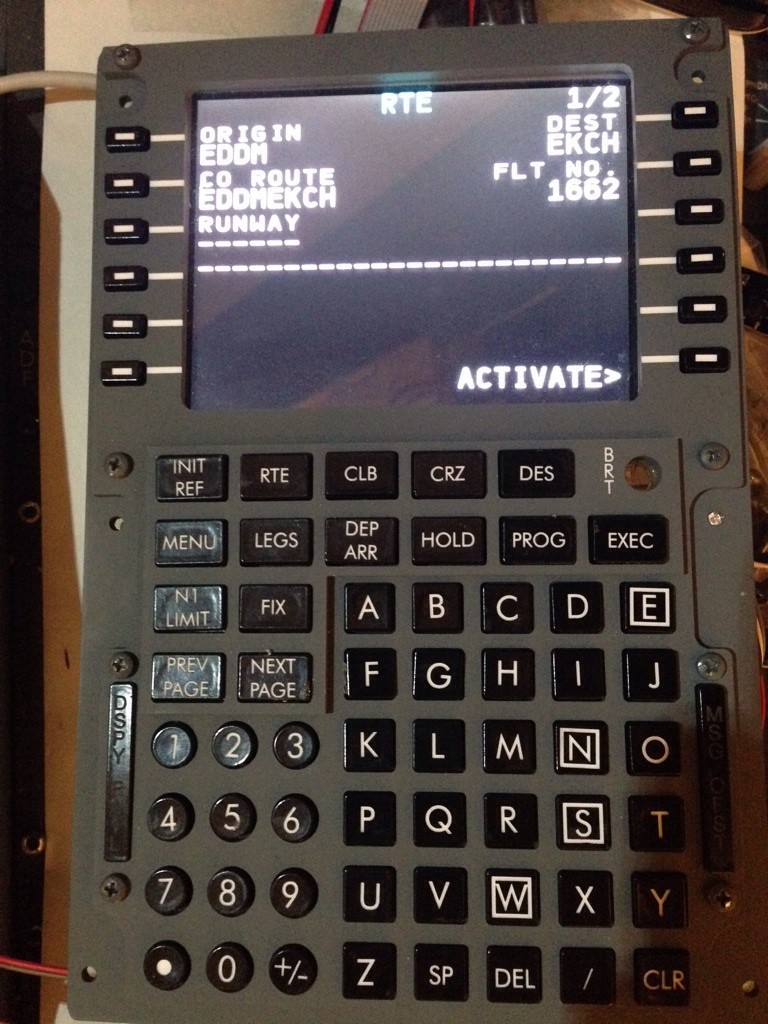
Working FMC
Now it works!
My FMC/CDU is now working after an extra few weeks.
I gave up getting my PSone screen working and ordered this screen from eBay. In case the link is broken I bought the AT050TN22 screen and the “KYV-N2 V1” driver board as a bundle.
Most FMC-tutorials mention the PSone screen as the way to go. But that most have been many years ago. Nowadays you can get a new screen must cheaper than your average used PSone screen on eBay. And you can get the screen with VGA, DVI and/or HDMI input. Using the PSone you have to go through quite a hazzle to get it working with signal converters or soldering wires on to the circuit board.
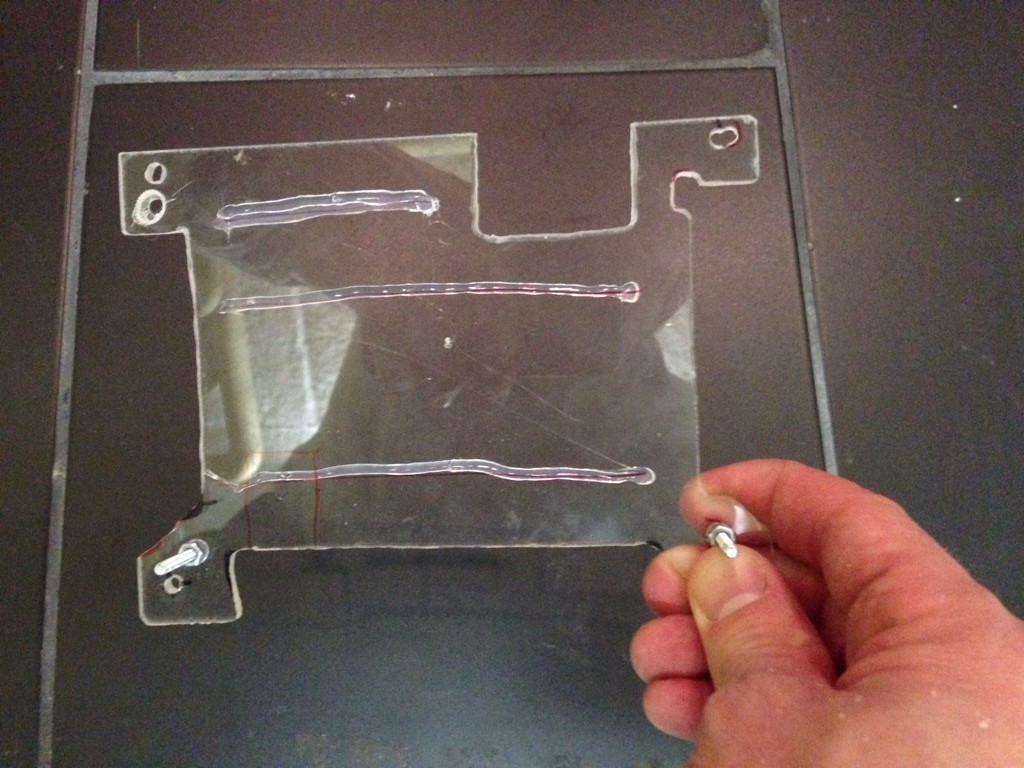
Mounting palte for FMC screen
So a few advises on mounting the screen in the OpenCockpits kit.
I made a plexiglas piece that looks like the one on the right. the holes in the corners fit the screws on the FMC. Also note the three rows of hot glue. When cold, the glue presses down on the screen and keeps it in place. The “hole” in the top is where the connector from the screen to the driver board fits.
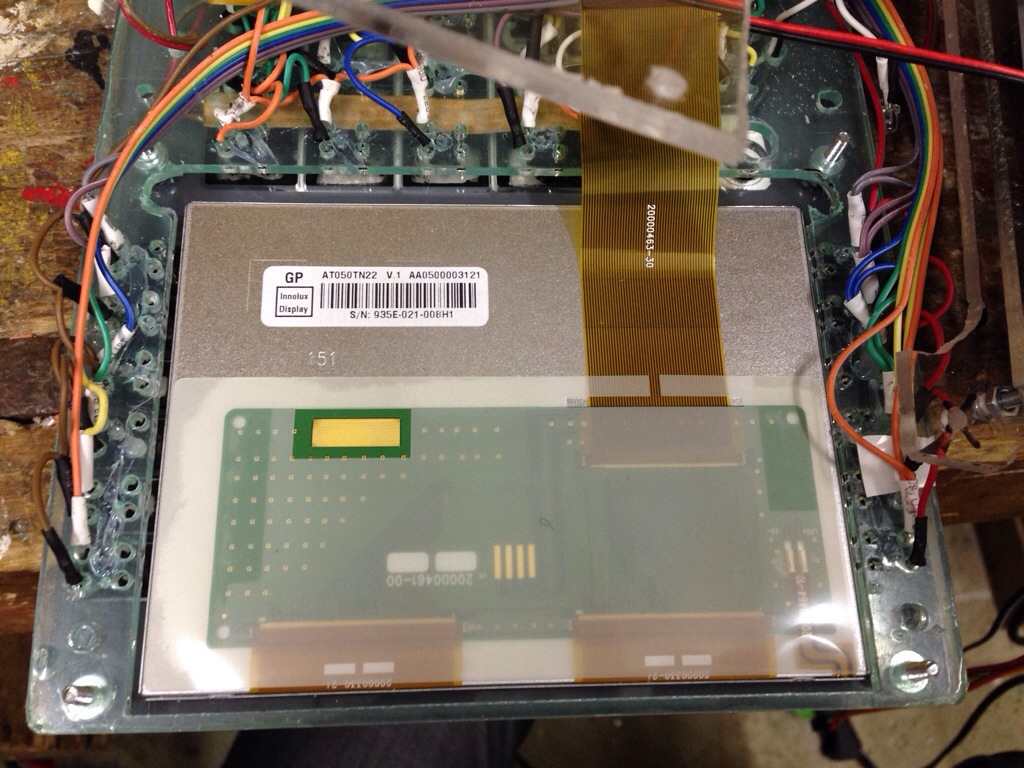
Here you can see the screen fitted into the OpenCockpits FMC kit. When you install the monitor be aware that it should be mounted so that the lettering is up-side-down. Just so you don’t – like I did – end up mounting the whole thing before realizing that I turned the screen the wrong way. So the connector should face down on the FMC.
Once again it is time for a cold beer!
But I have run out of beer. Doh!
Now I just need to mount the FMC in the cockpit. I hope to be able to do that in the weekend.

[…] I also mention in FMC Part 8 I gave up getting my PSone screen working and ordered this screen from eBay. In case the link is […]
Hello Peter.
I have a question. Witch interface board did you use for the Cdu?
Greatings from Stefan
the Netherlands
Hi Stefan. I use the OpenCockpits KeysCard.
Regards Peter
Thank you so much Peter. You are truely my source of inspiration.
Greatings
Hi Peter, just coming across this blog for FMC DIY build.Nice blog. However you did not give details of how you connect the wires, screen to driver boars to FMC pcb etc. What software did you use to interface the FMC to your simulator? The 5″ screen is obvoulsy smaller than the space on the PCB, hos did you get it to stay on the pcb?
I use I OpenCockpits keys-card for the interface. SIOC (OpenCockpits) interprets the buttons to a keyboard press which then is read by Prosim. The ProsimCDU fills out the screen.
As I did not use a PCB I made a room for the screen.
I keep the screen in place using the piece os plexiglass in the second picture. It is mounted using the 4 screws in the bottom-picture. Tighten them and that keeps the screen in place.
Regards Peter