
First steps towards a throttle
828. May 2013 by Peter
After laying around a few months I have again taken a look on the throttle.
At first my intent was to make something that would at least just look like a throttle. But in my search for pictures of other home build throttles I had a closer look at Rubys page and his awesome throttle. Rubys finish is amazing! And so I got inspired and decided to move from “just look a little like a throttle” to “as good as possible” which means that I will do the homework before assembling the throttle.
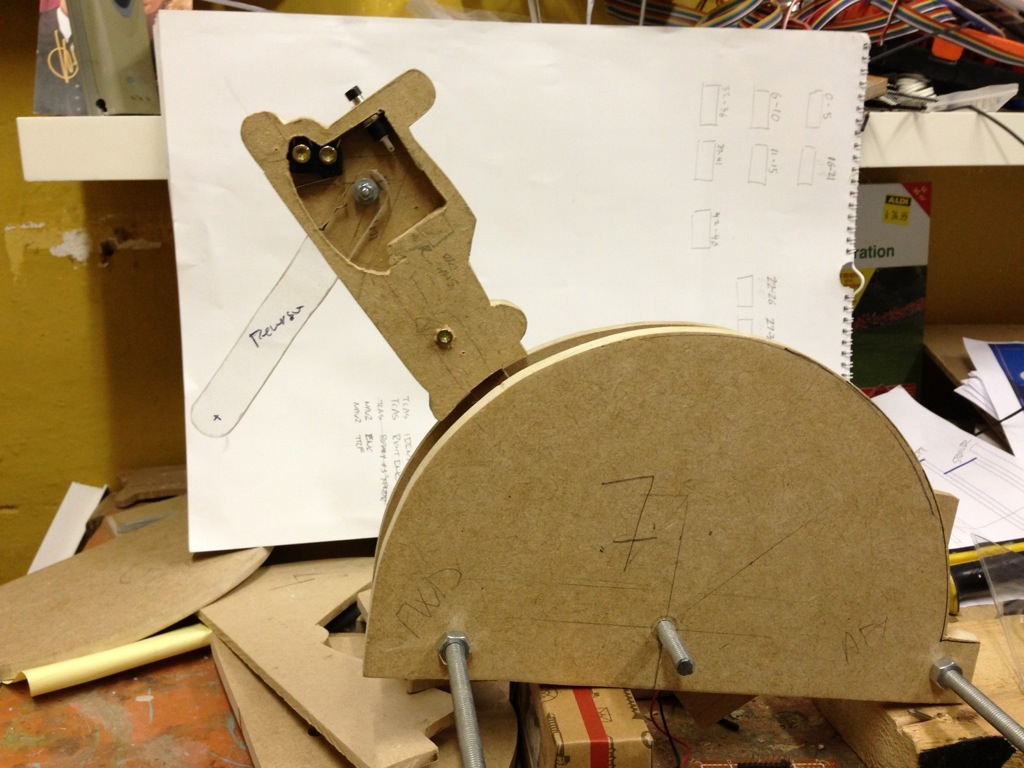
Right throttle lever
For the same reason I will be building it in phases. Each throttle-lever is a separate phase. The flaps-lever is a phase and the spoiler a phase and finally the cover. The (In my eyes) clever in this strategy is that the levers is attached to one of the 11 plates. So I can finish 1-2 plates as a section and then assemble it as a finished section.
So first step is the right-side throttle-lever.
What I am working these days is the handle and what is going on inside the handle.
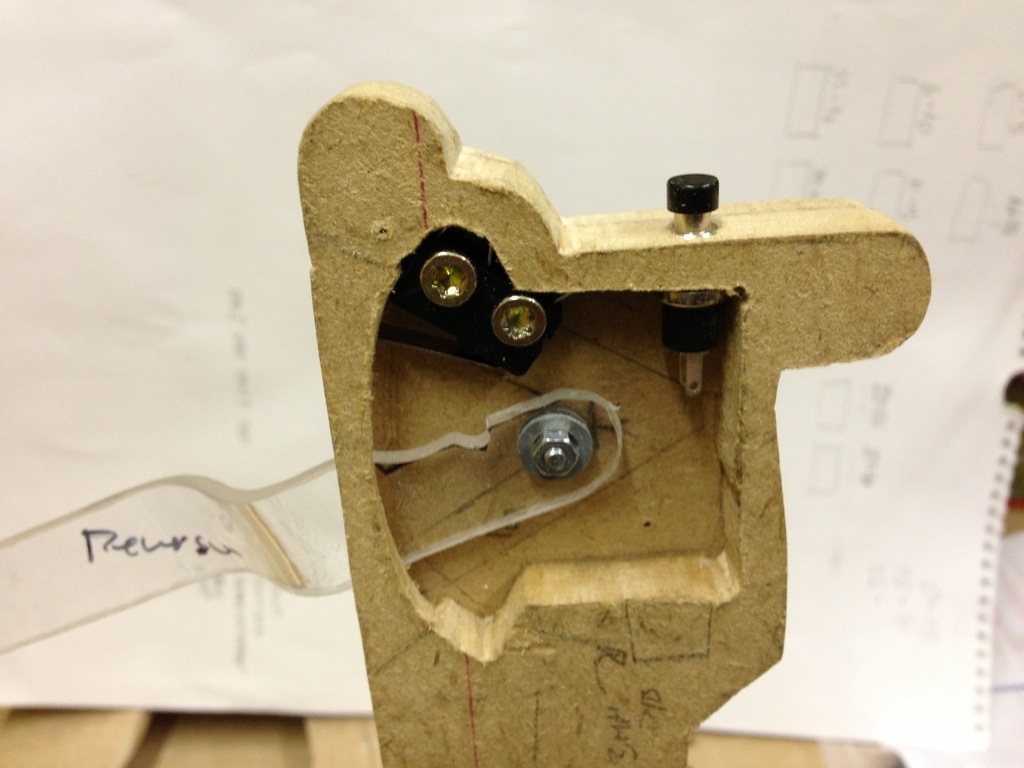
Close-up throttle handle
The picture on the right shows a close-up of the inside of the handle. There are two switches inside that needs wiring. A push-button and a micro-switch.
What I still need to do (apart from the wiring) is to install some sort of spring (or rubber band) that can pull the reverser-handle back to “idle” position when left untouched. And I need to make a “slot” to transfer the wires down from the throttle-handles.
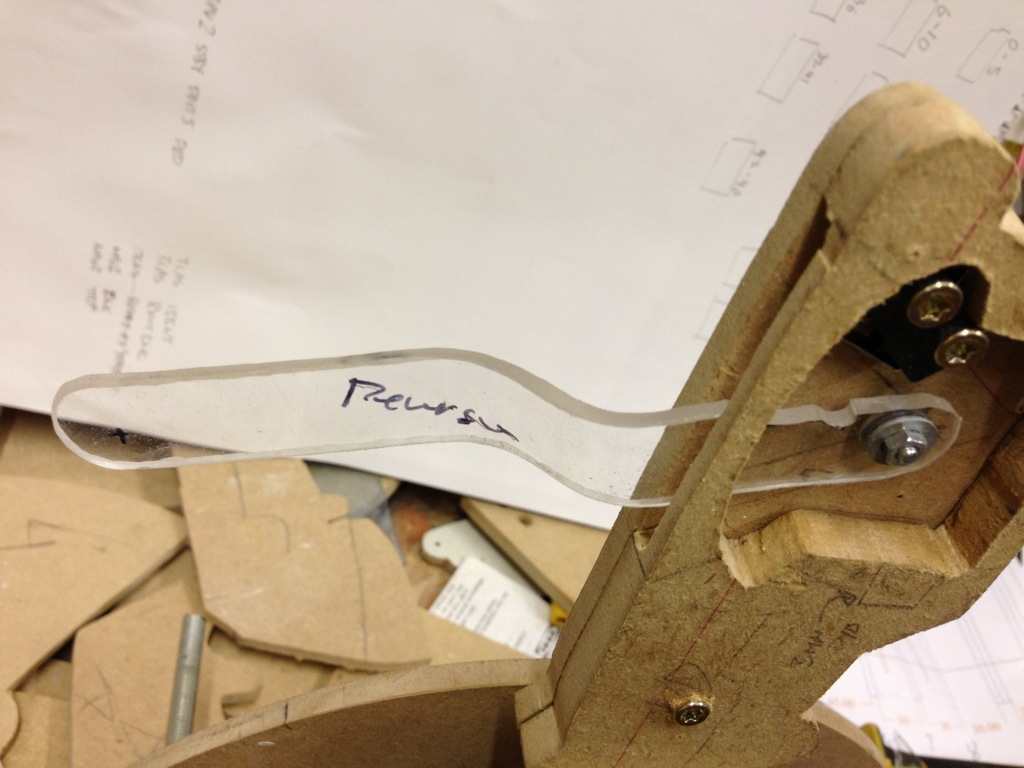
Reverser handle
The reverser-handle is made from 3mm plexiglass, cut 2 cm wide. I thought about making them out of metal. But first of all I have no access to metal and no tools to bend it. So I chose plexiglass and have bended it using a heat gun (the kind you can remove paint with). Turned out pretty good!
As you might notice in the picture above the upper part of the handle needed a small cut to make room for the micro switch (which is not that micro).

please help me , what size rod do you use is it 8mm or 10 mm , and do you have anyhelp for me on constructing it
Hi Curtis.
I have used 8mm rods.
Unfortunately my progress is close to zero… 🙂
I have chosen to focus on one part at a time. This means that I will finish one plate – and all attached to it – at a time.
To begin with I am focusing on the right throttle handle. So I am making that and attaching it to the plate (cant remember if it is #6 or #8). This plate also contains one of the fuel cut off, so I need to make that one as well before plate #6/8 is done and I can move on.
It is so great with comment on the blog! Your question reminded me that I it has been too long since I have done anything to the throttle. That kinda kicked me in the right direction so now I am (slowly) making progress – finishing the first throttle handle.
But things are getting along so slow that I have bought a (used) set of CH yoke, pedals and throttle quadrant that hopefully will arrive tomorrow.
Cheers
Peter
could you give me links to the measurements of the throttle handles, it would be greatly appreciated
Hi Damon.
I use the measurements found on this blog http://www.737ngproject.be/throttle.htm
Regards Peter
Hello Peter
I see that this article is from 2013. Is your throttle finished or have there een changes?
I would really like to see the throttle in it’s current condition.
Many greetings
Thibaud Desutter
Hi Thibaud.
Well. Not much has happened over the last year. Until last week where I actually restarted this project. No news yet, but hopefully there will be some in 2015. So far I have changed the inside of the throttle handle from micro switches to a pot on the reverser handles.
There is so much to do. I just started and I am trying to get the MIP together. Next will be the pedestal with the radios, and then???
Wow. you are a genious…