
FMC part 5 – Spaghetti land
510. February 2014 by Peter
So welcome to Spaghetti-Land.
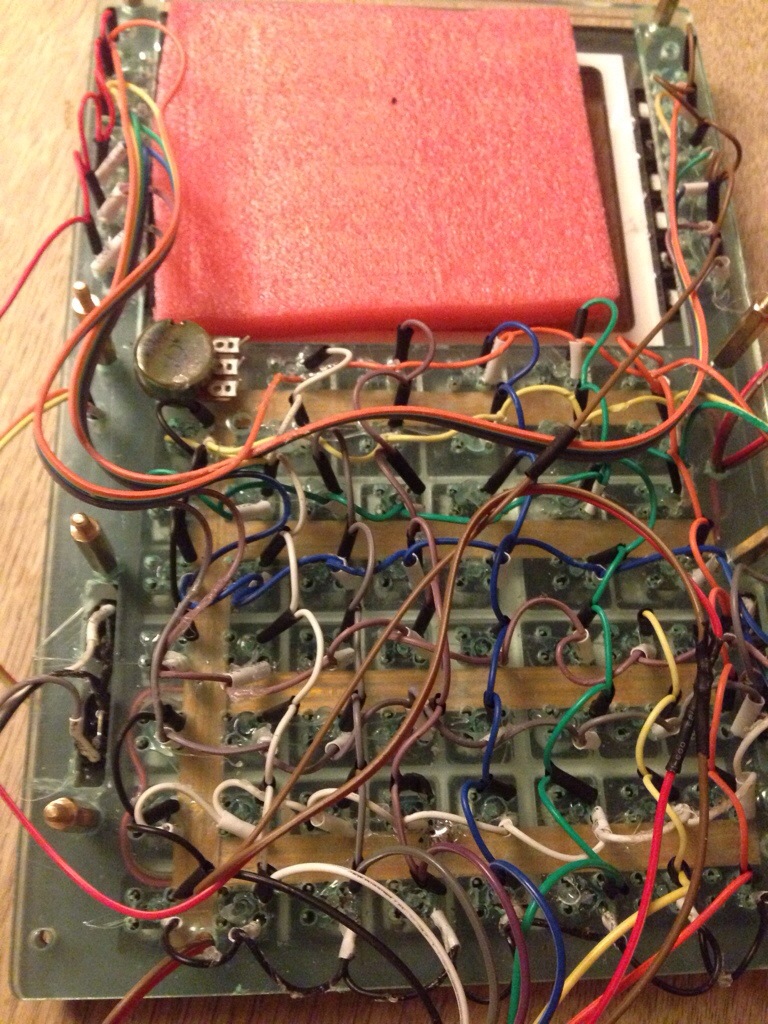
Spaghetti Land
The last three evenings I have been wiring the FMC. Each of the 69 switches needed 4 wires. So that is a total 270+ solderings (an additional 140 for the legs on the switches). Did the last one close to midnight yesterday.
On the one hand this is yet another milestone. Done! All I now need is the screen. But on the other hand I still have not tested all connections yet, so I might end up redoing some of them. Also the matrix layout took some time to understand, so I am not sure that all wires are fitted correctly. Hopefully they are! But even though I should be glad this is now done; I must say watching paint dry would have been more fun than this. My back and neck is all sore today after sitting bended over the wires the last couple of days with the soldering iron in one hand. At some point I started to think about whether the smoke from soldering tin is toxic. But I quickly dismissed that thought while all covered in the fumes and haze of soldering. Welcome to Happy Land!
I am glad that I not am self employed or in any other way could go out and earn money in the hours I have used on these wires. I estimate that the wiring has taken me around 12 hours. This so I could save €75 and not buy the PCB and mounting plates from Open Cockpits. That is a ridiculous €6 saved per hour. And I have even not tested it yet, so that figure might go down.
In retrospective I am not sure that was the right place to save money. The window for errors is quite large with 410 connections. And with the PCB almost all work would have been done for me. So if you have the money I will strongly recommend that you also but the PCB if you embark this journey.
The next couple of days will show if all connections work… Stay tunes for yet another frustrated blog posting in a few days time.

First of all I love your blog. I did build FMC from Opencockpits and you are right without lads strip light it is not visible.
I built it with two LIOBodner cards (32X2=64) and a board from a 3.5$ gamepad (5 swathes)
And programmed it on IFLY by LINDA
Hi.
Good idea with the gamepad. A few years ago I made a matrix from a hat-switch on a joystick. This gives you 8 inputs.
I have bought a OpenCockpits USBkeys card that I plan to use.
I have an EFIS from Hispapanels and the buttons are not with white letters but transparent. When what unit not is backlit you are not able to see the letters at all. At least on the OpenCockpits you can see the white letters as long as there is light in the cockpit.
Regards Peter
Wow! Really nice work! Your blog is really helpful and interesting! Can’t wait to see more about your fmc…
Any Idea where from can I buy pcb?
Of you are thinking about “blank PCB” like strip boards or prototype boards I suggest eBay. I found boards of good quality and good price at Tayda Electronics.